

Want More?
Sign Up for updates straight to your inbox! Woohoo!
Drysuits are usually a pretty huge investment. So it make’s sense that when you take the plunge, you get something that perfectly fulfils your desires.
However what is perfect for you will almost certainly not be perfect for someone else and when it comes to drysuit shopping there are an overwhelming amount of options to choose from. Starting with the material of the suit to zipper placement, valves, seals, gloves, boots and other accessories. That’s before we even start talking about what goes on underneath!
If you’re already overwhelmed then I don’t blame you. We’re here to help. As warm water divers who were literally fresh off the boat when it came to drysuits we did all the homework for you. So follow these simple steps to start building your dream drysuit today.
Not sure what a drysuit is or if you need one? Then check out this guide to exposure protection for scuba diving.
Disclosure: Some of the links in this post are affiliate links. This means if you go through them to make a purchase you will not pay more but we will earn a commission. These links help to promote products we personally believe in and fund more resources for our readers.
Unlike wetsuits which are always made from neoprene, drysuits can be made from various different materials. As technology progresses these materials change and improve. Nowadays there are two main types: neoprene and laminate.
Each of these materials has various pros and cons which may change based on water temperature, travel, personal dive habits and shape.
Neoprene foam drysuits are essentially the same as wetsuits but use seals and watertight zippers to keep water out. They are generally less expensive than other drysuits and also provide thermal protection, eliminating the need to buy undergarments. Of course undergarments can still be worn if necessary.
The material also has some stretch, making them more comfortable to wear. Perfect if you lose or gain weight easily. As there is a fair amount of give the suits can also be better form fitted, making them more streamlined and reducing drag. Pus the material is much easier to repair than other drysuit options.
On the other hand, the same thing that makes neoprene a great insulator also makes it very buoyant and sensitive to pressure changes. Just like with a wetsuit you loose buoyancy and insulation as you get deeper and pressure compresses the material. So not only will you need to carry more weight to descend but you will also have to adjust your buoyancy more than with another drysuit. Most likely using more gas in the process.
Additionally neoprene is a much bulkier material that takes up space and weight. It also drys slowly which not only makes it a pain to pack but also causes evaporative cooling when worn wet at the surface. This is not as much of a problem if you are primarily diving locally and have ample space and time. However is a major disadvantage when travelling often.
Some of the drawbacks with buoyancy and bulkiness can be reduced by opting for a crushed neoprene drysuit. However you will loose some insulation in the process. They are also more expensive, although last a long time (commonly over a decade) so the cost-per-dive might not actually be that bad.
‘Laminate’ otherwise known as ‘membrane’ or ‘shell’ drysuits can be made of a range of materials (commonly bilaminate & trilaminate) which form a thin waterproof layer over the diver to keep them dry. They are durable however not as much as crushed neoprene.
As there is no thermal protection, all insulation must come from undergarments. While this may seem like a negative it actually means the suit can be used in a much wider temperature range. Warmer waters only requiring a moisture wicking undergarment and layering up as temperatures cool. The thinner material also drys quickly, is fast to repair and packs down well.
However one thing shell drysuits lack is stretch. Due to this the suit must fit loosely to allow greater range of motion. This could be a deal breaker if you are likely to change weight as the material is not as forgiving. It also means the suit looks a lot bulkier on, although if it’s look you’re worried about then shell drysuits also come in a much wider range of colours.
Now neoprene and shell drysuits both have their advantages. Where one is tougher and stretchier the other is lighter and more adaptable. So what if we want the best of both worlds?
Composite suits use more than one material to take advantage of the best characteristics of each. The most common type using crushed neoprene from the waist down as this area suffers the most wear and movement, and trilaminate from the waist up to reduce overall weight.
The two main disadvantages to a composite suit being cost and that different materials require different repair techniques. Meaning you need two sets of repair supplies and know how to use them.
A long, long time ago (cue music) engineers in the U.S. space programme created special air-tight zippers for the astronaut pressure suits. Thanks to these guys, drysuits now have watertight zippers. These zippers let us get in and out of our suits fairly easily without leaving a gaping hole where water can get in and make us wet.
Without a working zipper we don’t have a working drysuit. No zip, no suit. Making them one of the most important and also expensive parts. If they break, repair is not possible and replacement costs are often so high that the whole suit gets scrapped.
Manufacturers are constantly innovating, trying to find the best locations to reduce wear and improve ease of use. So when building your dream drysuit consider the advantages and disadvantages of each.
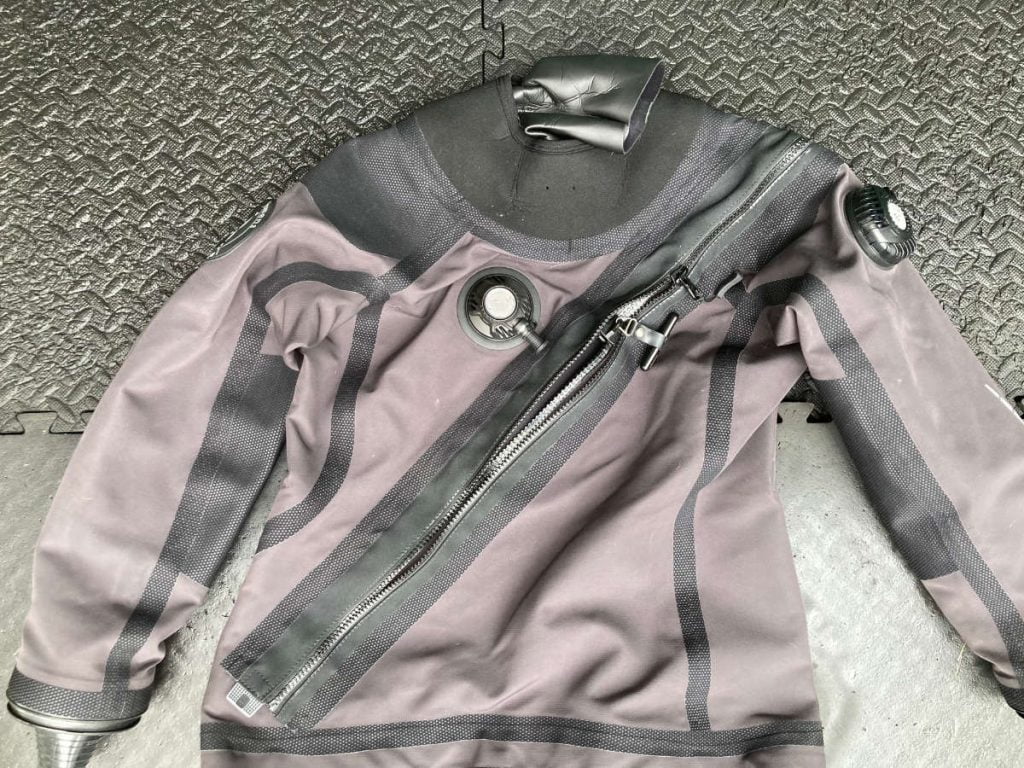
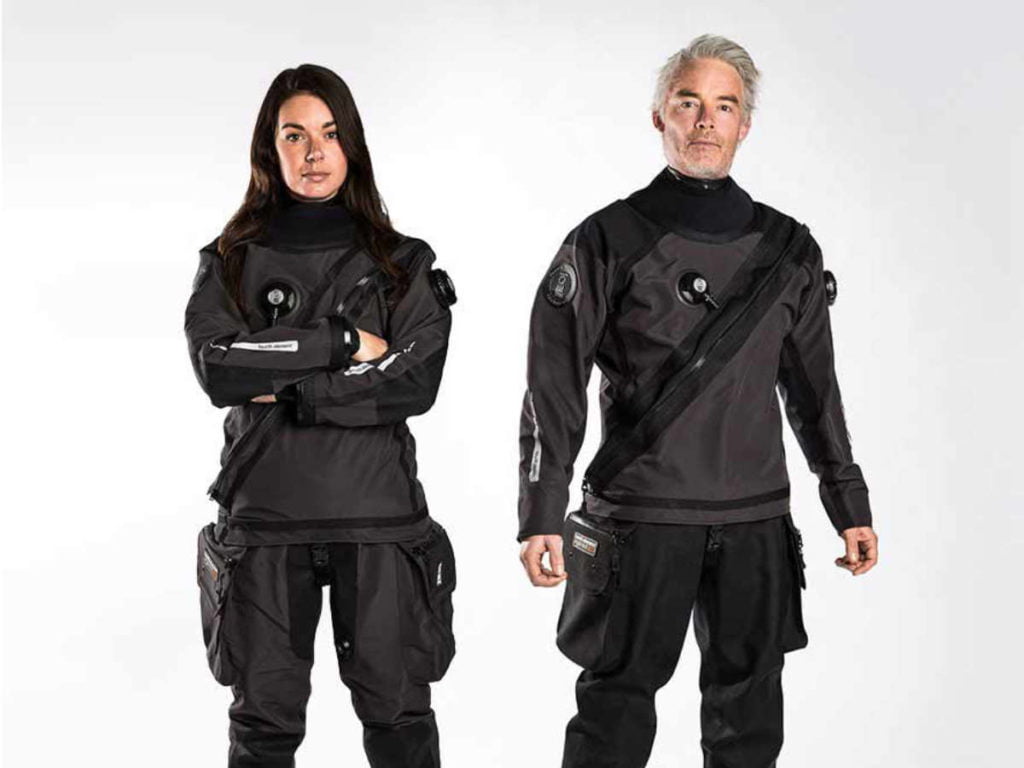
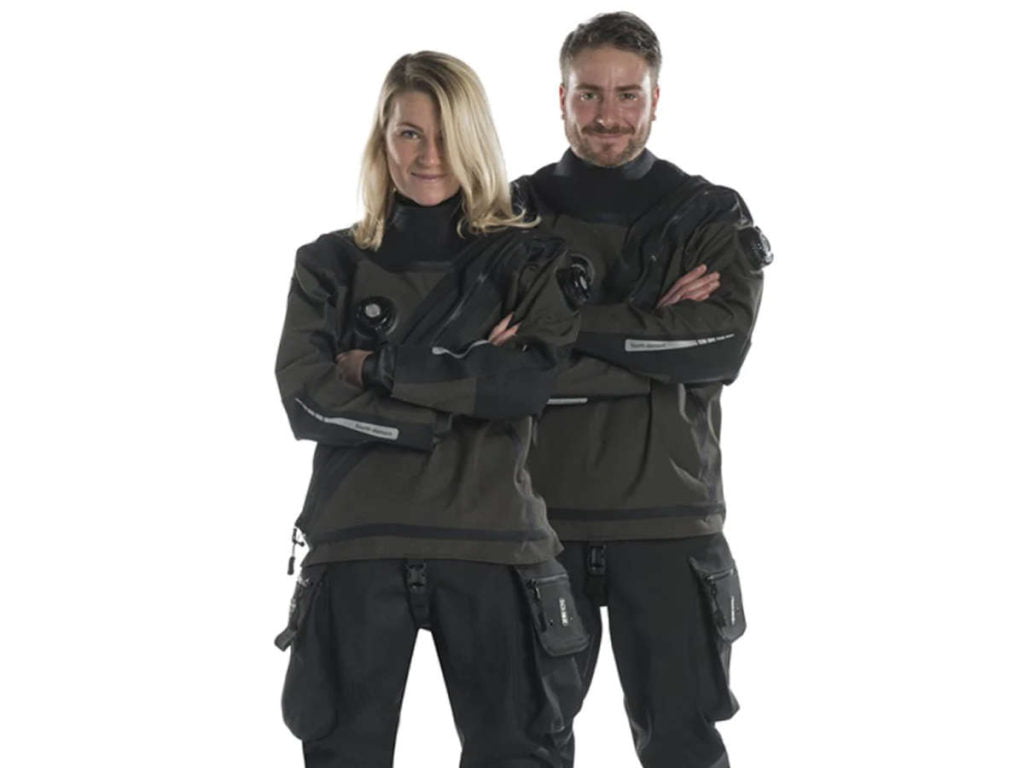
Cross chest zippers from shoulder to opposite hip are the most popular location. This is very similar to how the mercury space suits were configured as it allows the wearer to easily and independently get into their suit without help. Some drysuit models combine this zip with a telescopic torso, which provides extra length whist doing it up but overlaps and secures the extra material once in place.
However one downside to this kind of placement is that it runs very close to the valves. If you’re quite large and have a lot of ‘real estate’ on your suit then this is not an issue however if you’re smaller, especially with narrow shoulders, then you may have to reconsider placement of the zip. Some manufacturers offer to swap sides so instead of running left to right the zip runs right to left to solve this issue.
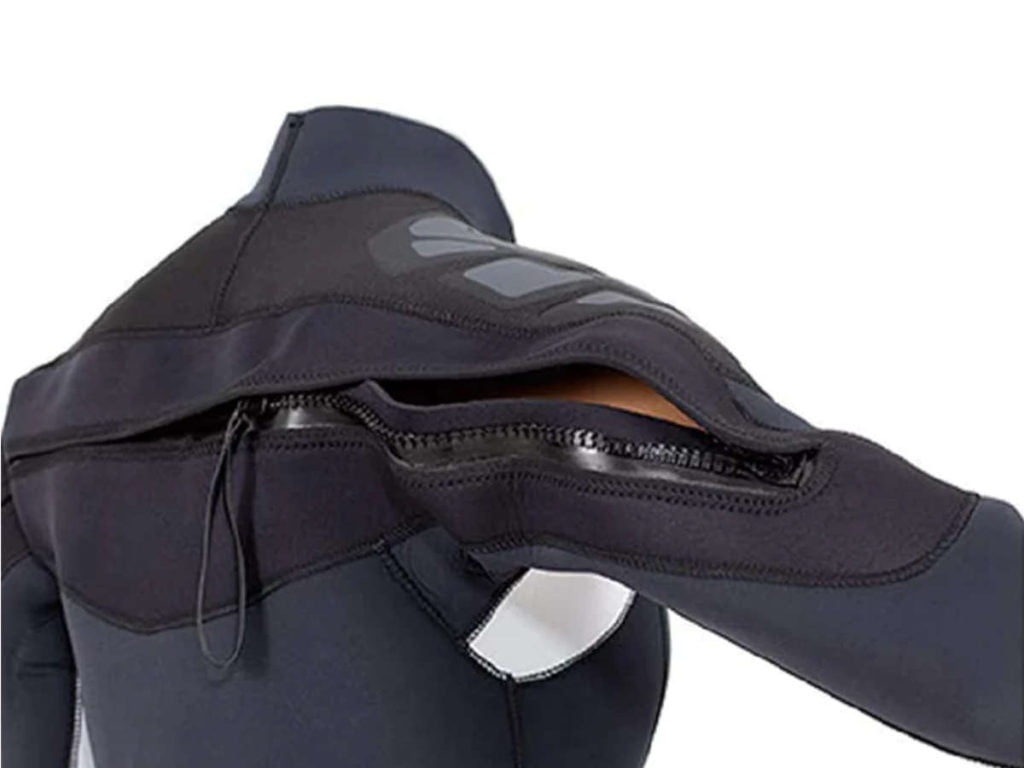
Across the shoulder zippers are also quite popular. Mostly because they are relatively easy to get into. However, unless you have double jointed shoulders, you will need someone to zip you in an out. Although a bit irritating when you’re desperate to get kitted up or down and need to wait for a pair of free hands, it’s not really a deal breaker for most.
As Drysuits create an air space around your body, gas needs to be added and released as pressure changes to prevent suit squeeze or over inflation. Just like a BCD we do this by using an inflator valve and an exhaust valve.
Although there is not a lot of variation when it comes to valves it’s still worthwhile considering your options.
However valves are also one of the easiest things to change and service on a drysuit. So worse comes to the worst if you are unhappy in your choices, or didn’t have a choice at all, then it’s not the end of the world.
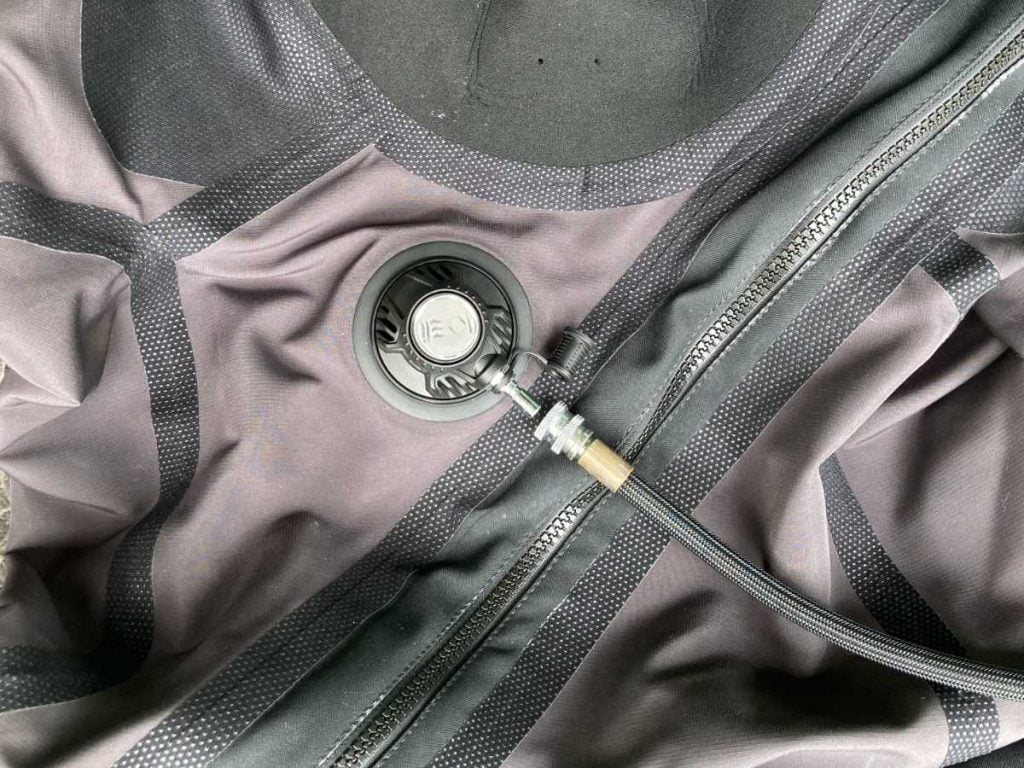
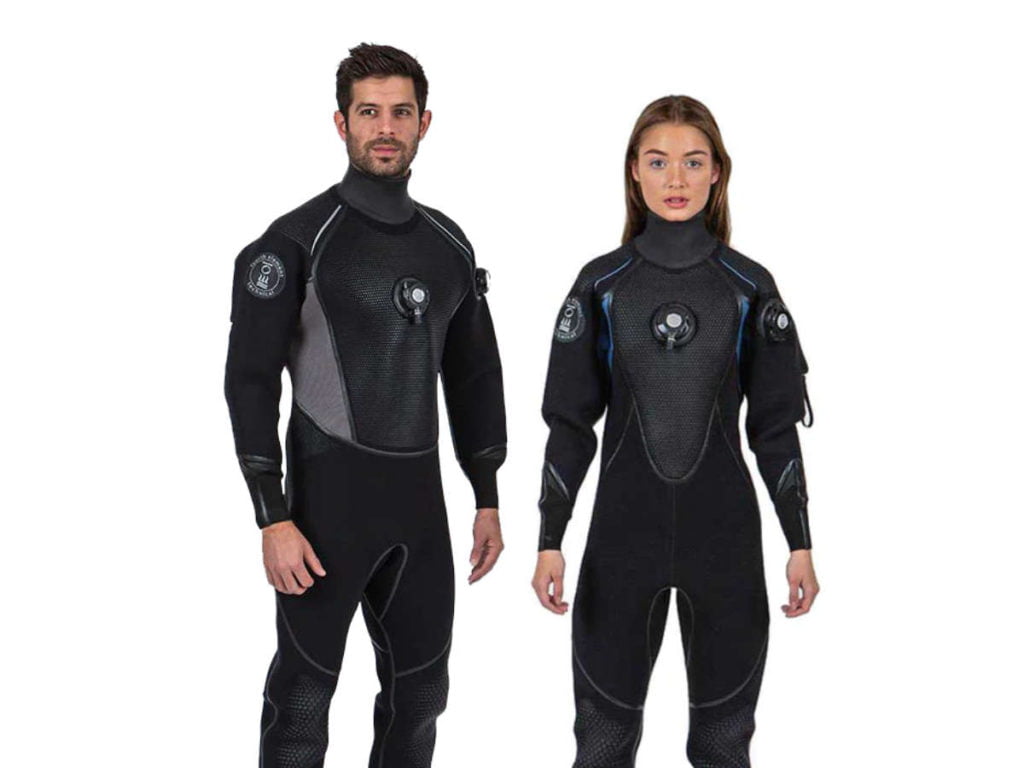
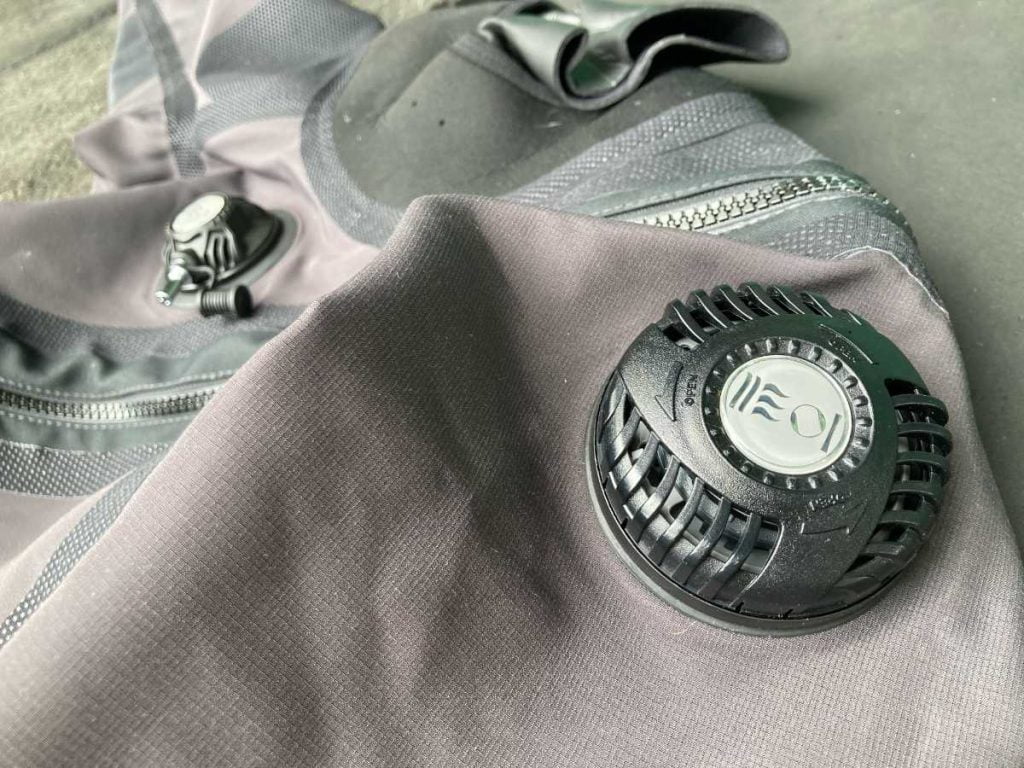
Just like Tony Stark’s Arc reactor, the inflator valve on a drysuit is typically placed slap bang in the centre of your chest. You add air in short bursts by pressing a button.
Just like on our BCD the inflator connects to a low pressure hose on your regulator, or to a separate tank if you’re using argon. Usually the connection is the same as the one on your BCD, however sometimes this connection is different. Often the manufacturer will send an inflator hose with the suit when you buy it. Under NO circumstance go diving with an ill fitting hose or without one all together.
Sometimes you can choose which inflator valve to get on your drysuit. If there is a choice then features you should look out for are:
The Apeks Swivel Inflator Valve is a popular choice as its covers all those bases. As the industry standard it is fitted to almost every new suit globally.
Again like a BCD, drysuits also have exhaust valves. These let you release gas from your suit to control buoyancy.
Most modern suits come with automatic exhausts. You set these by turning the outside so that it will automatically adjust the air in your suit to meet your buoyancy requirements. As you ascend, expanding air will escape as it needs to.
Some older model suits may come with a manual exhaust which requires you to manually vent the suit. Due to the convenience of an automatic exhaust these are not common anymore.
Location is also important. Typically exhausts are found your highest points, as the gas will always want to travel upwards. The left shoulder is the most common position but you may also have secondary valves on the wrists and/or ankles.
Shoulder valves tend to be much more convenient however some people note that bulky clothing and movement of the arms can block airflow. Positioning of the valve on the upper arm is important in this case.
Wrist valves can solve that issue but on the other hand can dump more easily as the hands move around more than the shoulders. It also takes up valuable real estate on the arms. Most divers need this space for computers, slates, compass etc. Plus it is another obstruction that can get caught when moving in and out of equipment.
Both drysuits and BCD’s have inflators and exhausts. One thing they don’t have in common is the P-valve.
If the name hasn’t given it away, a P-valve is a small valve usually positioned on the lower leg. On the inside it connects to either a condom catheter (males) or She-P (females). Once glued to your private bits you can then use this valve to pee as you please.
They are most commonly used in technical and commercial diving. Mainly due to the increased risk of a diver wetting themselves due to extended dive times. Not such a worry if you’re wearing a wetsuit but causing all kinds of problems in a drysuit.
If you don’t want to spring for a P-vlave but don’t want to risk it, adult diapers are a popular alternative. Especially amongst females where the She-P is not as reliable.
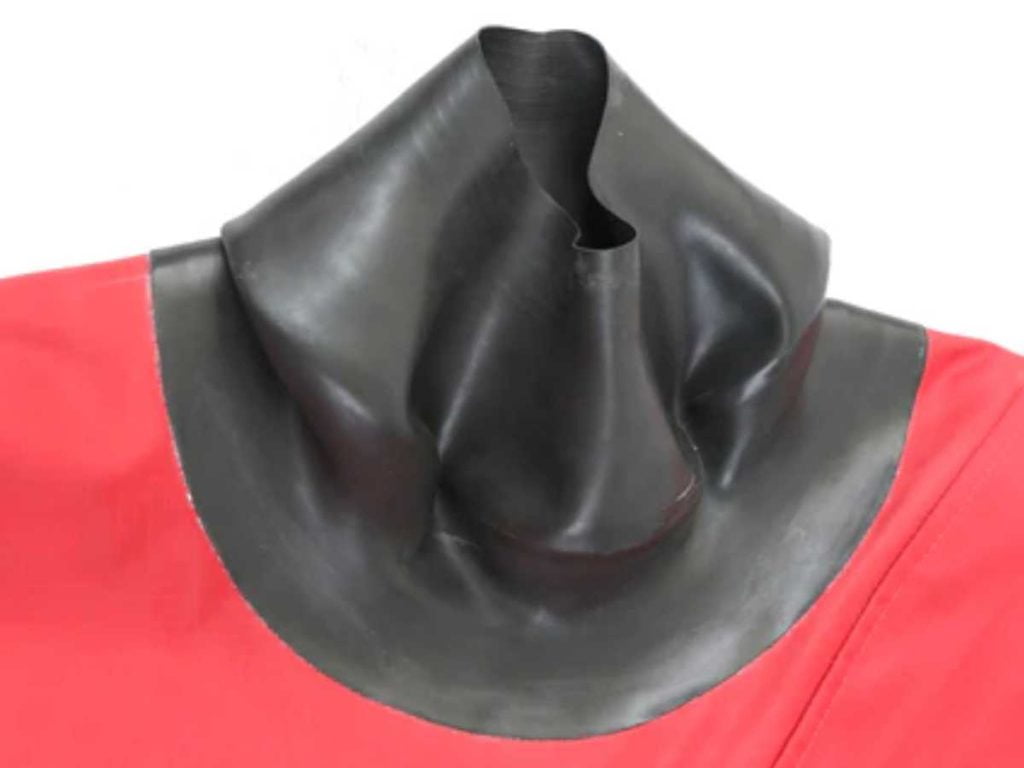
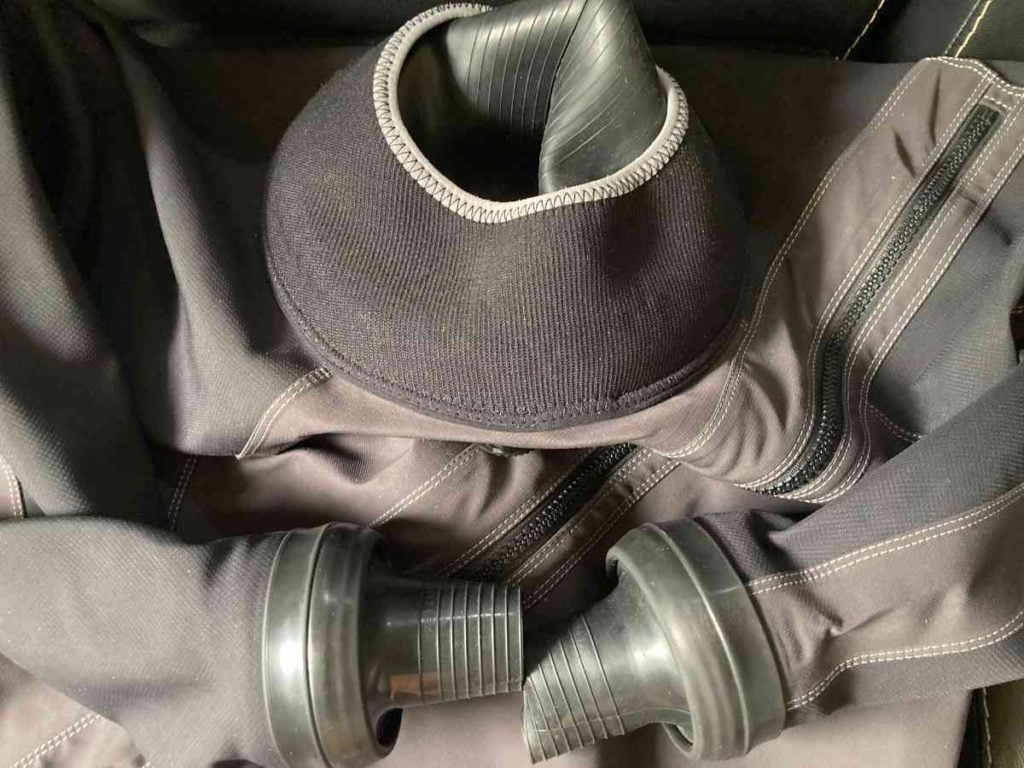
After the zip, the seals are the next most important component of a drysuit for keeping you dry. As he name suggests seals create a seal between your neck and wrists, preventing water from getting inside. A improperly fitted or broken seal can make the entire drysuit ineffective so it’s important to think about your options carefully.
Unfortunately a magically soft yet flexible material that doesn’t rip when pulled too hard does not exist just yet. Instead we can choose from latex, silicone or neoprene.
IMPORTANT: Never dive with a neck seal that is excessively tight. The body mistakes this pressure on the carotid arteries as elevated blood pressure and signals the heart to slow down. As the pressure continues the body keeps lowering the heart rate until the diver gets light-headed and falls unconscious. Underwater this leads to drowning.
Most divers at some point have used a latex seal. They are cheap, simple and readily available. Due to the soft nature of the material they give a reliable closure.
Unfortunately this also makes them prone to damage and stretching. Some people purposely stretch the latex so they are not too tight however over time you run the risk of getting loose seals. Loose neck seals cause air to leak out whilst letting water leak in. Storing latex for long periods of time or exposure to certain chemicals and cosmetics can also cause them to degrade and stick together.
Higher quality latex has no memory so is less likely to loose their shape and thicker seals are more durable but come with the price of being less flexible. Meaning you could run the risk of loosing circulation in your hands if not fitted well.
Although relatively easy to replace, If you were unfortunate enough to damage your latex seal you would not be able to go diving for a week (possibly weeks) depending on your repair skills. Fixing them on the fly is also not an option as even if your a wizard with drysuits the glue needs hours to set.
Yet the biggest reason many stay away from latex is that they are actually allergic. Even if you’re not allergic some complain that it irritates the skin, especially with repetitive diving.
To fit a latex seal: have someone hold it while you cut with long sharp scissors. Take off about 5cm/1/4 inch at a time (most suits now come with guide lines) until it fits comfortably. Be careful not to over trim. If unsure take it for a few dives before making another cut.
Silicone seals offer many of the same benefits as latex with less of the drawbacks. It is thin, flexible and most importantly hypoallergenic!
As very little sticks to silicone we need to attach these seals onto our drysuit using a ring system. A softer internal ring is glued to your drysuit then the silicone seal sandwiched between that and a harder external ring.
Some see this as a negative as the rings are more uncomfortable and obstructive. This is especially the case around the neck where ridges dig in and interfere with the BCD. Like with the zip, those with narrow shoulders or a smaller profile may not have enough room to accommodate a ring system around the neck so latex or neoprene are the better option.
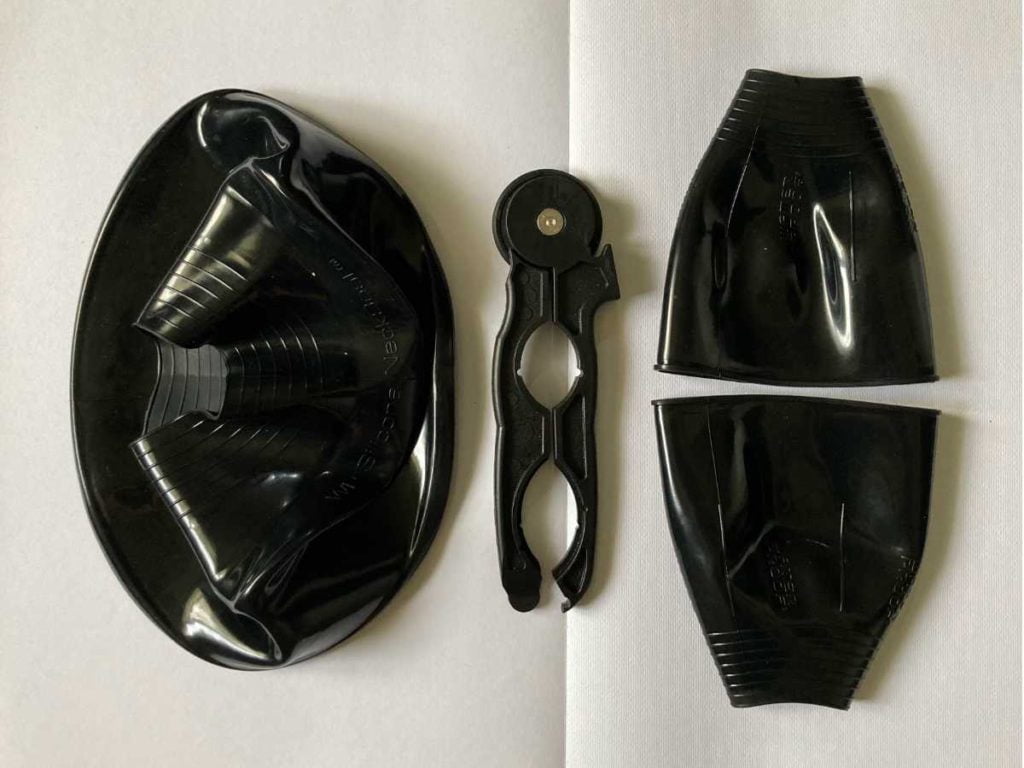
However for many, the fact that you can change these seals in minutes not days, without glue, far outweighs any bulk. Newer, more flexible, ergonomic designs are also constantly coming on the market to improve diver use. SiTech’s ISS oval ring system oval being a good example. Some neck seals also add a bellow so you can move your head around without leakage.
An added benefit of the ring system is that more and more of them can be used in conjunction with a dry gloves. Meaning you can easily adapt your suit to the conditions, exchanging your seals for dry gloves. Some systems like the Fourth Element Ellipse also allow for you to keep you seals and add the dry glove attachment over the top. Adding the advantage that if your dry glove does leak it won’t flood your whole suit.
If you’re a fashion conscious diver you might be happy to know that silicone seals also come in a range of colours. Bright colours are a great way to personalise and make you more recognisable once kitted up.
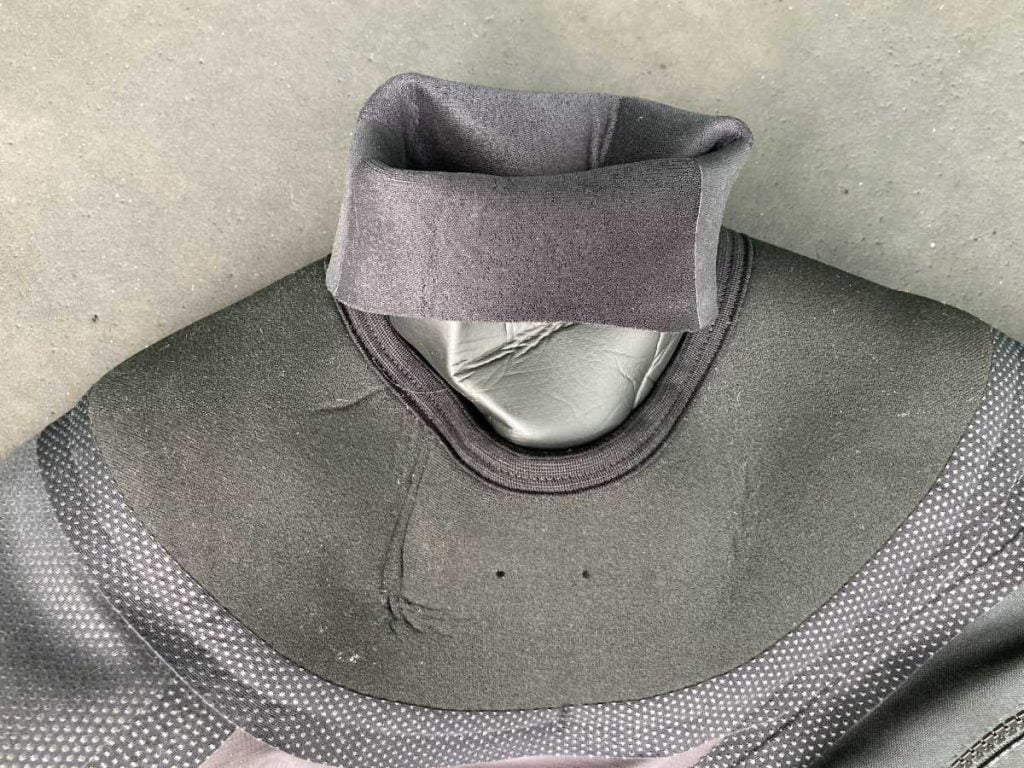
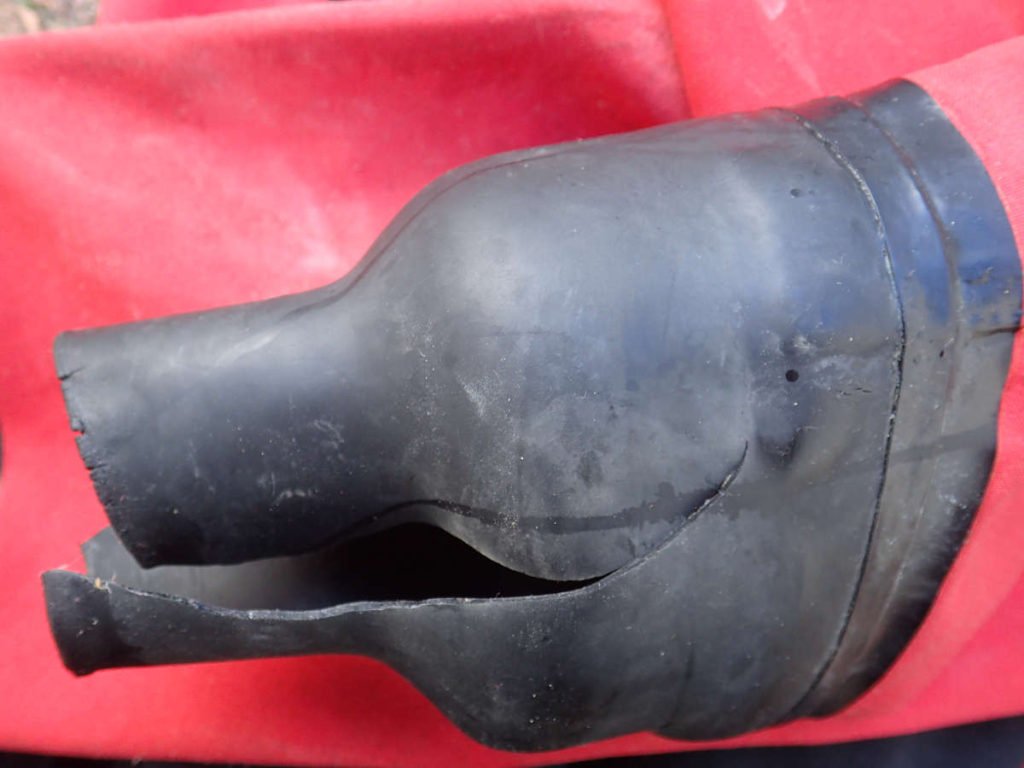
Made from wetsuit neoprene backed with nylon, neoprene seals are also popular option. They are much more durable than latex so are less likely to get damaged. If they do they are easy to repair in the field, though significantly more difficult to replace.
There are two types of neoprene seal: flat seal and fold under. Flat seals have a wide snug grip. They are less hassle to put on. Fold under seals are extra long and fold back on themselves. They provide a better seal but can be quite a fiddle to get into. Flat seals are commonly found at the wrists where fold under are more likely around the neck.
One advantage, particularly with a fold under seal, is that you get more insulation. With latex and other thinner materials, seals are often where you get a cold spot. However this thicker material can also feel more constricting for some, especially when around the neck. Fold under seals also tend to gather air in the crease which adds extra pressure.
To fit a neoprene seal: stretch it over a round appropriately-sized object and leave it overnight. Keep in mind that although not as prone to stretching as latex they will still stretch over time.
In all our talk of keeping dry there are two areas which are still exposed to the elements. Our hands and our head.
Our hands are important tools under normal circumstances but even more so during a dive. They help us adjust gear, open and close valves, check our gauges and are our primary form of communication.
But these body parts are in no way immune to the cold. If anything they are more sensitive to it. So it’s really important for not only our safety but also comfort that we start with investing in a good pair of gloves.
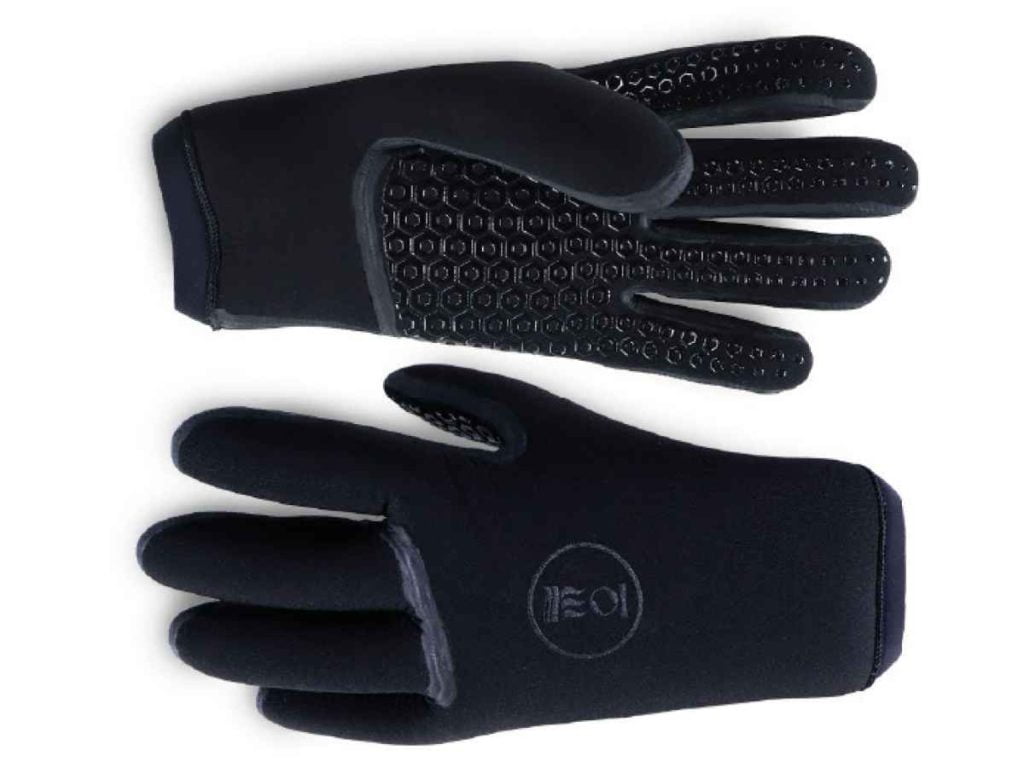
The simplest option is to invest in a pair of wetsuit gloves. These are made of neoprene of varying thicknesses depending on the thermal protection you need.
Thicker neoprene is more insulating and are more likely to keep your hands dry. However it is also thicker. Thus reducing your dexterity and also making them harder to get on. To try and combat this some models come as 3-finger mittens instead of 5-finger gloves.
Pro tip: wear a pair of lycra gloves underneath for increased protection and smoother changing. Latex or washing up gloves also work well but break quicker and are not great for the environment. If your gloves are already icy from a previous dive, pouring hot water in them can also increase comfort for a short time. This is not as effective if gloves are still dry.
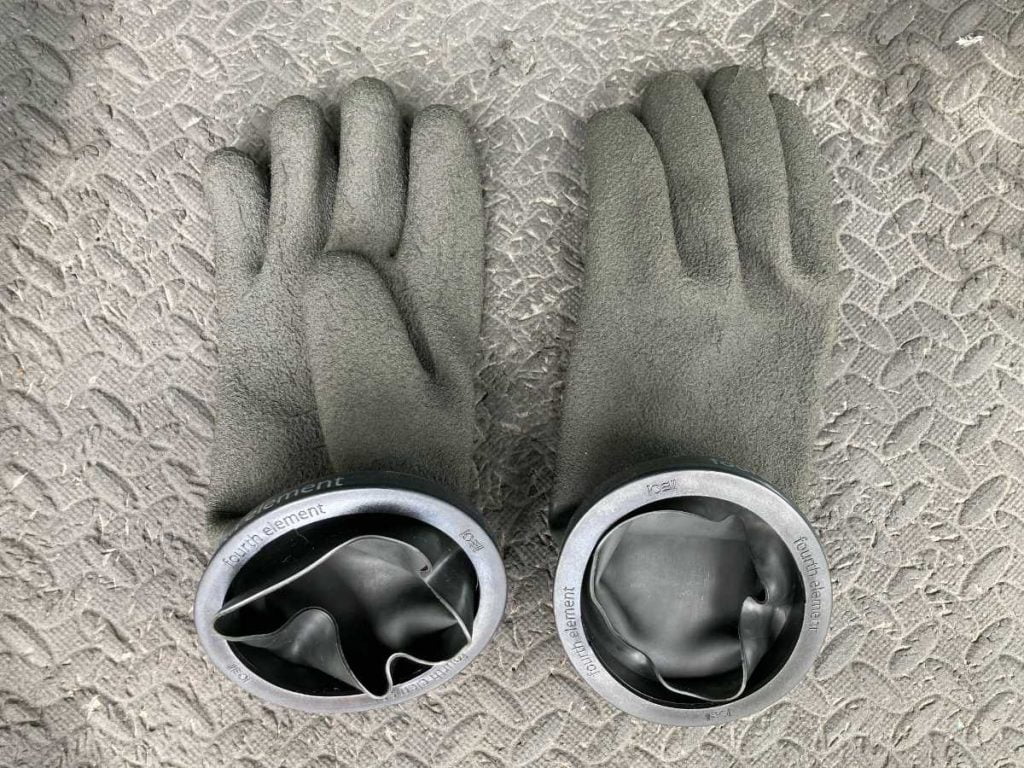
The other option is to use dry gloves. Like our drysuit the gloves are made from a thin material like latex or rubber and insulation comes from thermal clothing. A lot of divers prefer them as dry hands stay warmer. They also require less insulation so you retain better dexterity. To seal the gloves they can either be glued to the suit or attached using a ring system.
Glued dry gloves may be more comfortable and are less likely to leak from the seal as it Is permanent. But if you get a hole in the glove itself you will need to remove and re-glue the whole thing. Thus keeping you out of the water for longer. If you don’t have integrated wrist seals you also risk flooding your entire suit.
Alternatively, nowadays quick change ring systems can be fitted to almost any drysuit. Si-Tec, Kubi, Ultima or FE Ellipse systems being popular choices. You can either do this yourself or have them fitted by your drysuit manufacturer. The gloves can then be attached and detached (fairly) easily. This makes it very adaptable as you can dive with wet gloves, dry gloves or no gloves as you like.
Pro tip: dry gloves don’t have valves which makes them prone to drysuit squeeze. To prevent this place a straw or surgical tubing under the wrist seal to allow air to migrate. If the glove leaks, remove it then take out the tube to prevent full flooding. Your hand may get cold but at least your body won’t.
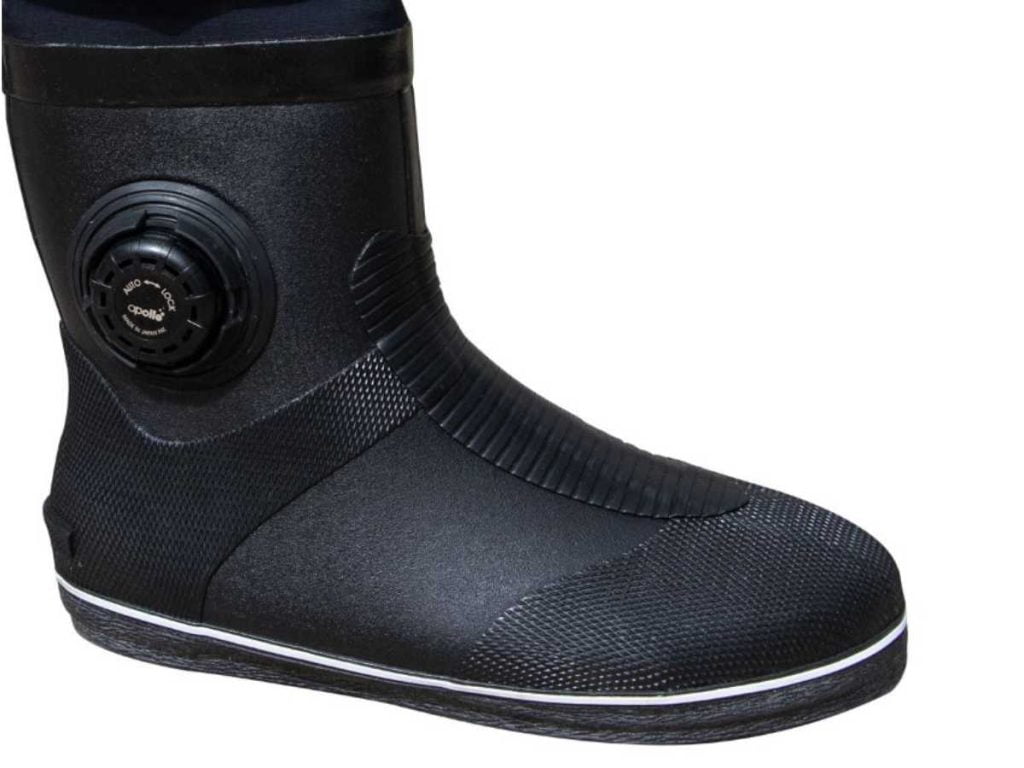
Drysuits come with two options for our feet: integrated boots or socks.
Either way, due to the added insulation you will usually have to go a size up or two to get a comfortable fit. My feet for example are UK 6, My Boots a UK 8. Some may even have to invest in a bigger pair of fins or swap out the strap when diving in a Drysuit.
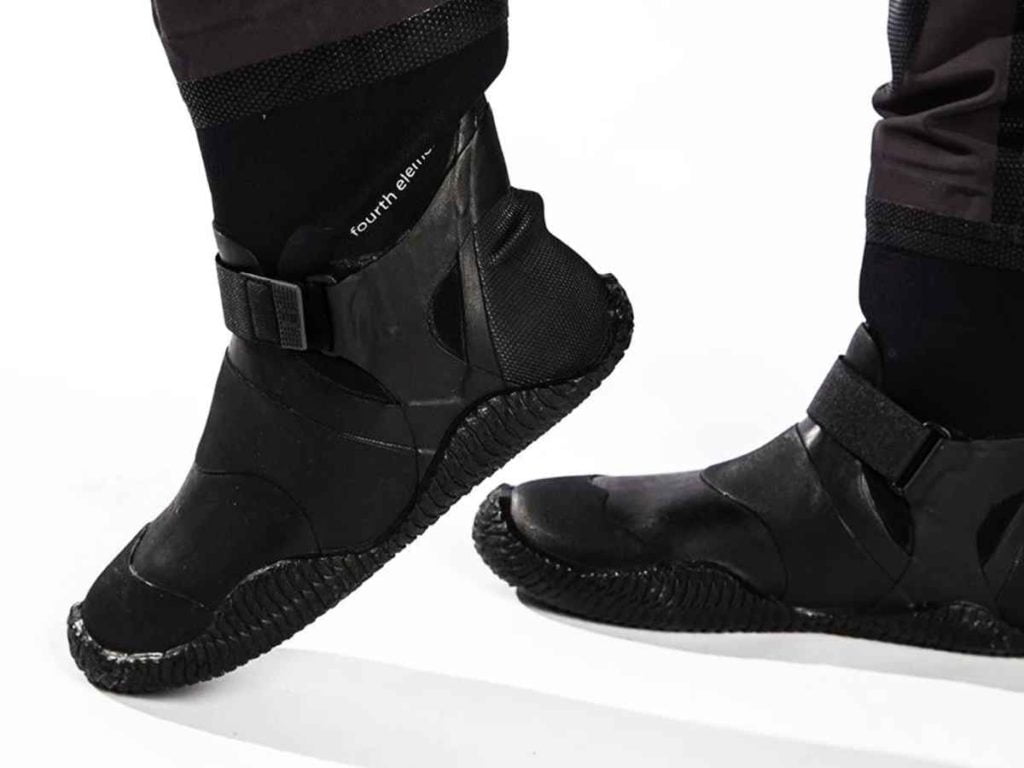
When it comes down to it, a drysuit with integrated boots is just more convenient. Simply sit down slip your feet in and you’re away. The boots usually come in standard ranges (eg. 10-12) or you can get custom sizes if ordering a custom suit. The disadvantage here being that if the shoe doesn’t fit well then it either needs replacing or you need a different suit! The same goes if they break or wear out.
Another common complaint about integrated boots is that they tend to accumulate more gas. This can cause ‘floaty feet’. To prevent this some drysuits come with straps or you can also purchase separate gaiters to prevent air movement.
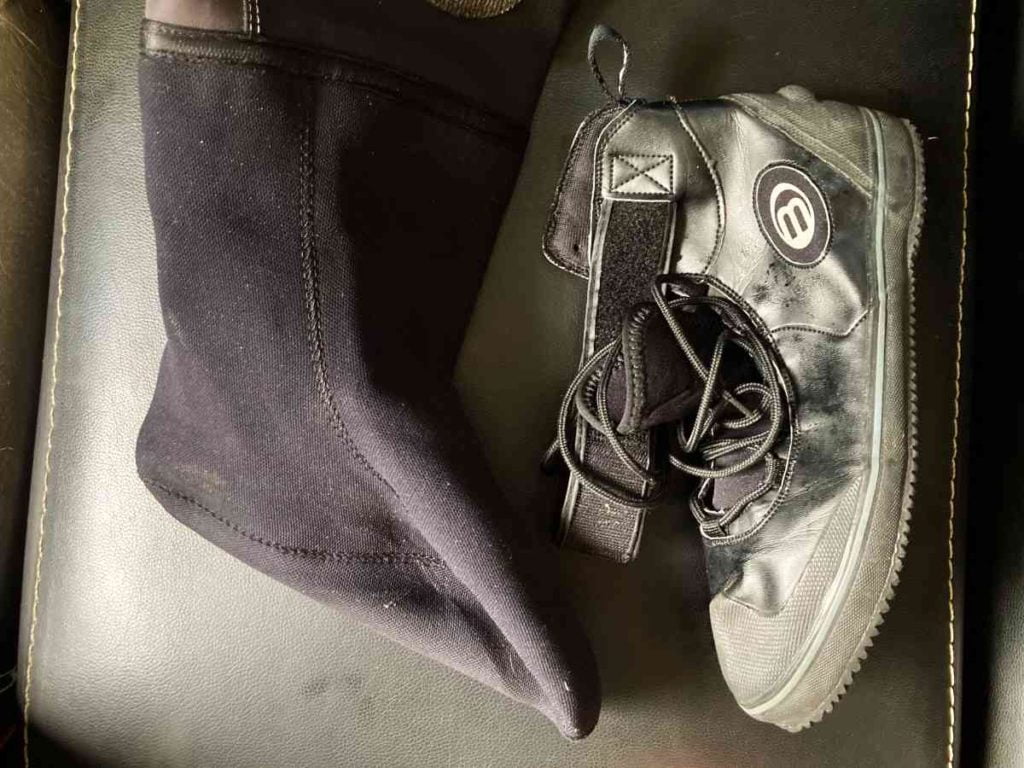
The only other alternative is to get a drysuit with integrated socks. Then buy separate wetsuit or rock boots to slip over the top. This helps to squeeze out any extra gas inside your sock.
A lot of people find this the more comfortable option as the boots tend to be a bit softer and can be adjusted with laces or zippers. There are also more options to choose from. Plus if the boots do get damaged or wear out they are easily replaced. Typically integrated socks need replacement far less frequently than integrated boots.
That being said the socks themselves are not very durable at all. Keeping your feet off the ground when dressing is really important if you want to avoid poking a hole in your drysuit. Yet that also makes getting changed a real faff. Changing matts go a long way to improving a sock users quality of life.
With this extra bit of gear also comes something extra to get lost or leave behind and an extra thing to dry. On the flip side the drysuit socks themselves invert for proper wash and dry where drysuit boots do not.
Michael Kors once said that ‘accessories are the exclamation point to a woman’s outfit’. It’s not a quote that will probably resonate with a lot of divers and drysuit shopping is about as far from the world of fashion as you can get. I mean what is sexier than grown adults sweating and peeing in a giant plastic bag covered in talcum powder. But he does have a point.
Accessories, although small, can make a huge difference to the overall look and feel of our suits. So why not see if these are worth a feature in your drysuit wardrobe.

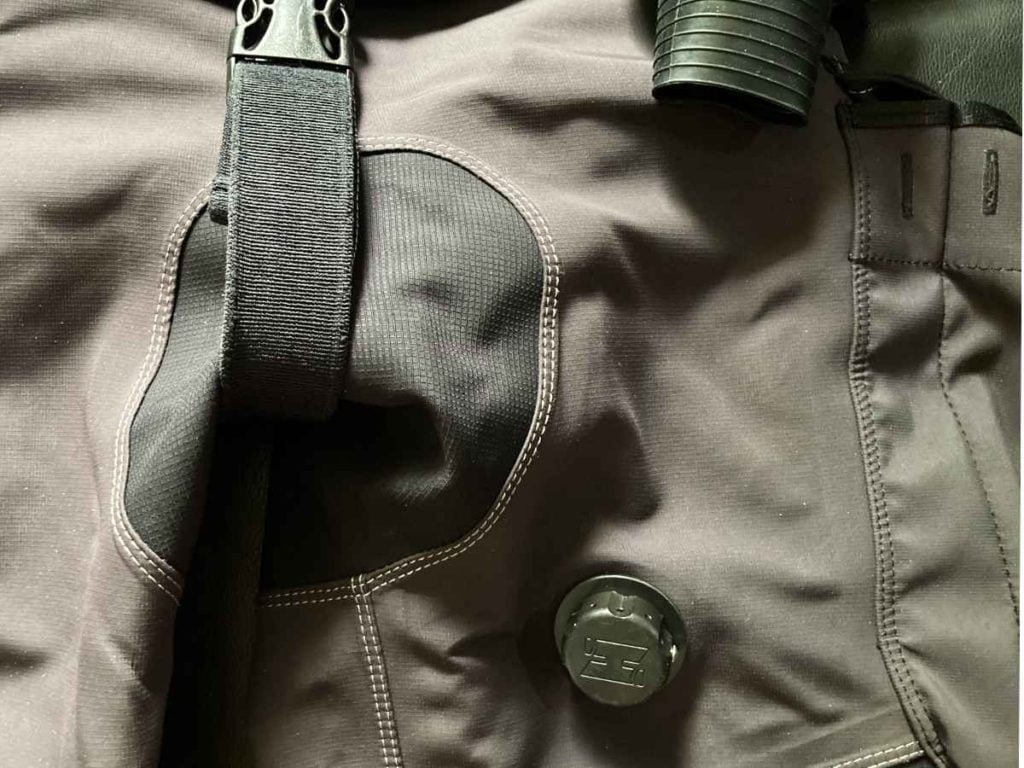
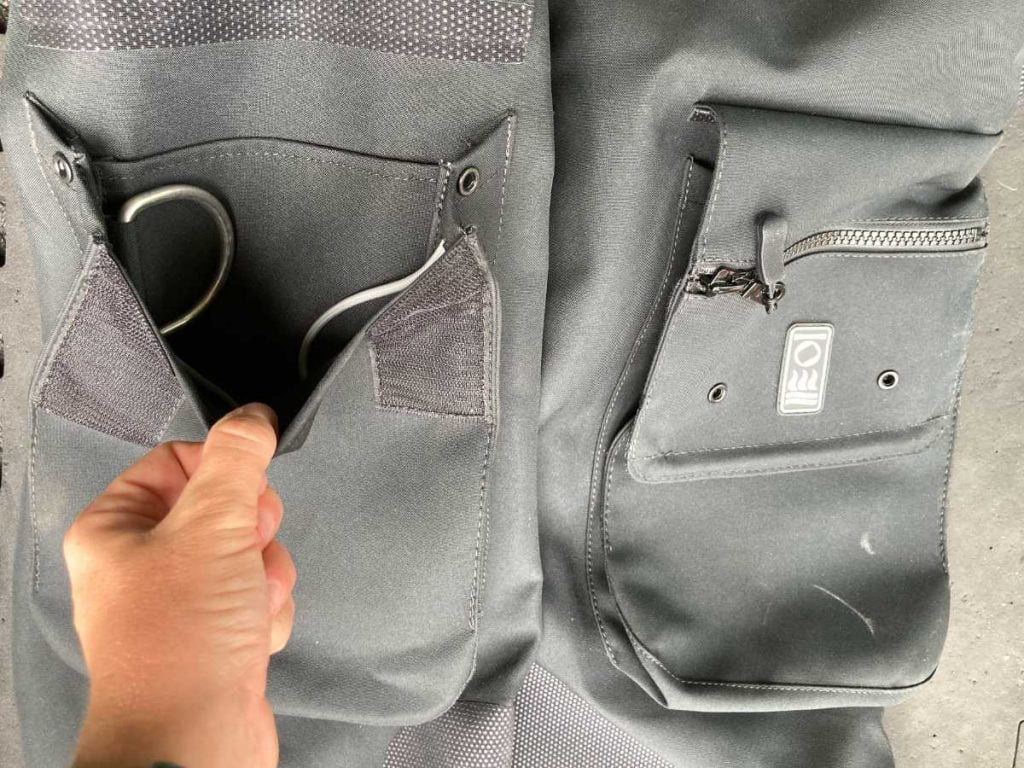
We gotta start somewhere and if were going for va-va-voom then there’s no better place to start than with suspenders. Nowadays quite a few drysuits come with suspenders. These pieces of elastic hook over your shoulders and hold the drysuit up when you haven’t got it on fully.
Although a non-essential when diving they are particularly useful in between dives. Especially if you want a bit of freedom from your suit but don’t want to completely de-kitt. Some brands like Santi also have a built in pinafore with pockets which can be great to store car keys or other small essentials.
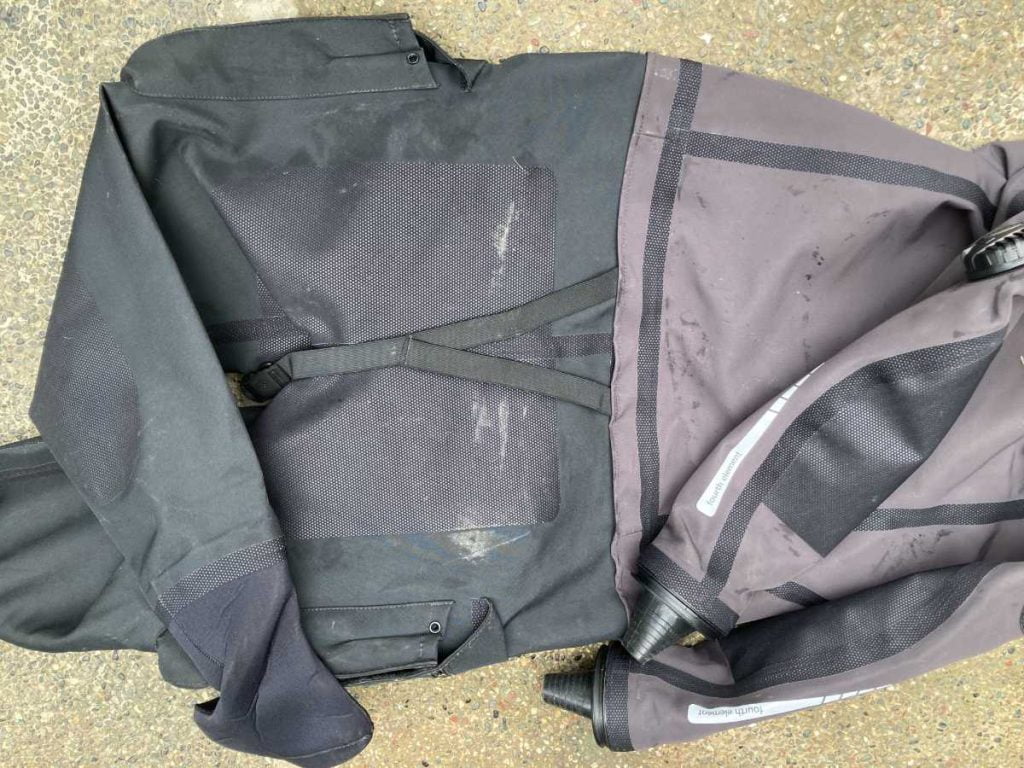
Ask any woman how they feel about pockets and I bet she will say that they can’t get enough of them! Pockets are great for storing our gear, keeping us streamlined and free from entanglements.
Just like with wetsuit diving, our drysuit pockets are also located on our thighs. Some drysuits come with them as standard where others have an option or none at all. Most peoples philosophy is that if a drysuit comes with pockets then what’s the point of getting rid of them? If they don’t then you have to decide whether the cost to add them will be worth it. Also if the type of diving you’re doing (wreck/cave/technical) requires it.
Although extra pads aren’t going to make any real impact on the comfort or performance of your drysuit, they will make a big difference to its lifespan. Particularly if you are in the habit of crawling on rocky surfaces, shimmying through tight crevices or even just shuffling places on your butt.
A lot of suits come with them as standard but they don’t it doesn’t take much to add them.
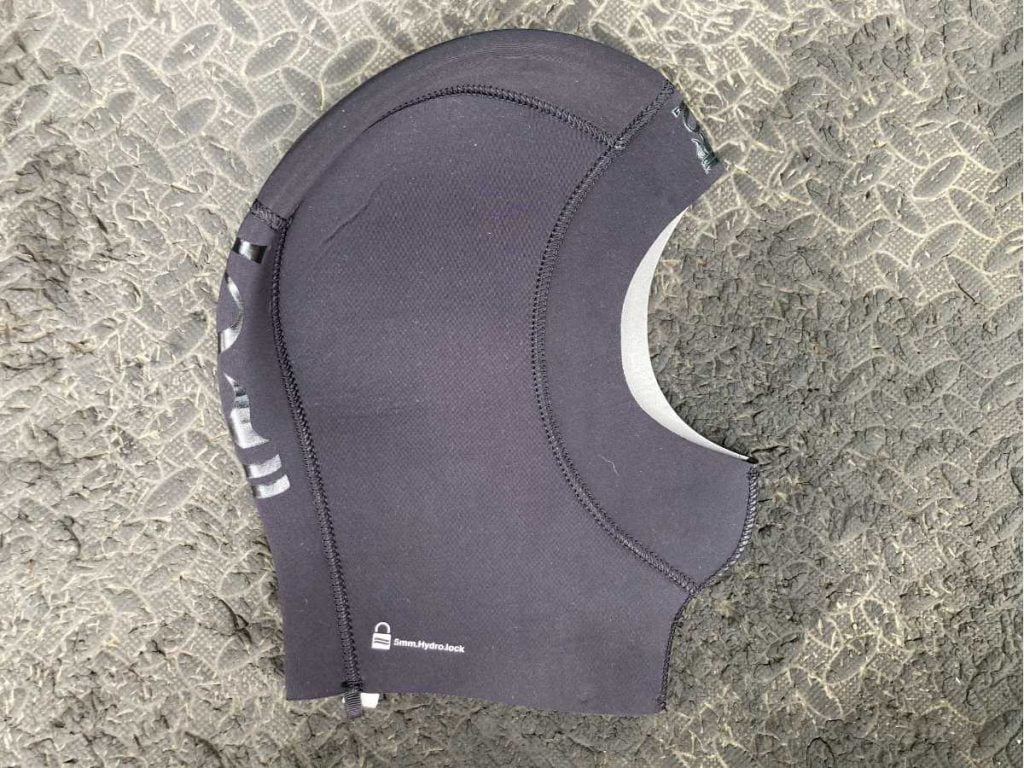
Back when we were talking about our hands I briefly mentioned that the other part of our body still exposed to the elements was our heads. Just in case you thought I forgot, I haven’t! It’s simply a much more straightforward choice when it comes to protection. Get a hood.
Some drysuit manufacturers provide a hood in a choice of different thicknesses. If not then it’s not really a deal breaker. Hoods are (comparatively) cheap addition which you can buy separately.
When I was drafting this post out it came to about 10 pages long. Without pictures. So a absolutely huge congrats if you have made it this far. Don’t worry the end is in sight! But before you go there are a few final considerations before you rush off to buy your dream drysuit.
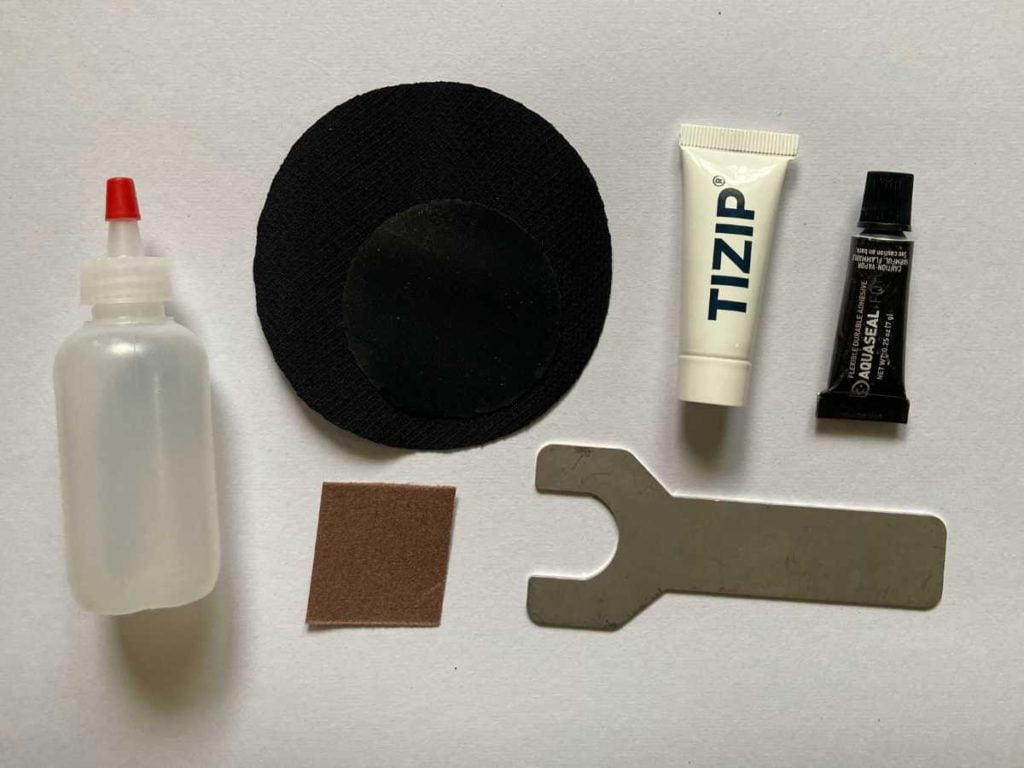
We can have the fanciest, most expensive drysuit in the world and it won’t matter if it’s got a leak. Sometimes we are able to patch these leaks by ourselves but sometimes we just need the pros to step in.
Depending on what brand of drysuit you have and where in the world you are based, this could mean shipping the suit off and waiting weeks for it to get fixed. If you can’t be out of the water for that long then it’s worth considering brands/shops which service closest to you as well as their usual wait times.
It may be that these brands/shops were not your ideal choice but make up for it in the fact that if something goes wrong you will actually be able to use you suit that much faster.
Good customer service is also hugely important in getting things done as quickly as possible. Both my wetsuit and drysuit are Fourth Element and one of the reasons why is because they are amazing to deal with. They even sent me some freebies when there was a manufacturing delay.
For those that have no option but to wait then small modifications like self-changeable seals can go a long way in preventing a visit to the manufacturer. Either that or get yourself a spare and you won’t have to worry at all.
Now all through this post we have been discussing the pros and cons of pretty much every drysuit feature. What we haven’t talked about is making it possible.
There are two ways to go about purchasing a drysuit. We can buy it ‘off the self’ or get it custom made.
‘Off the shelf’ drysuits have a standard sizes and features. You have less of a choice on what you get and will most likely have to make compromises vs. what you want. On the other hand they are usually far cheaper and deliver faster.
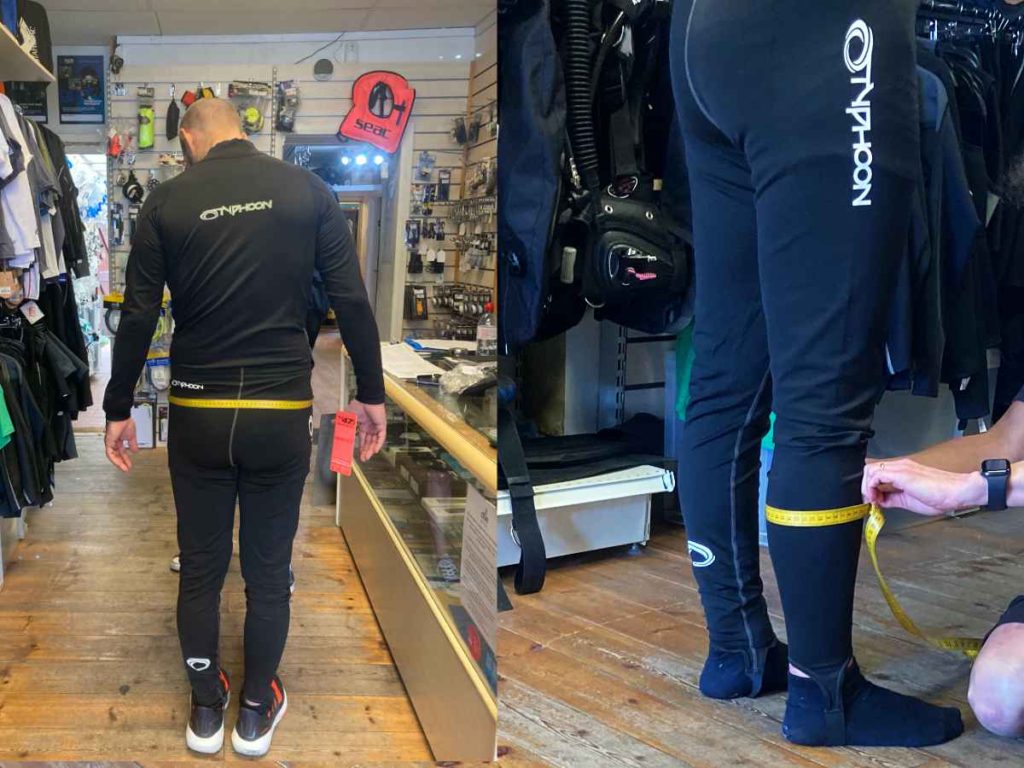
Custom-made drysuits take your individual measurements or (if your using Fourth Element) use a special photographic Biomap system to tailor a suit specifically for you. Each brand will then have a range of features you can also choose from. The price will usually reflect what and how many changes you make.
We got ours done by Aquanaught Scuba and Snorkel Centre in Kingston-upon-Thames, London and can’t recommend them highly enough.
For some, the only way to tick off their dream drysuit wish list is to get it custom-made. However before you splash the cash just consider what compromises you may be willing to make. It may just be that there is a drysuit out there that comes close enough to make the lower price-point and convenience worth it.
Sign Up for updates straight to your inbox! Woohoo!